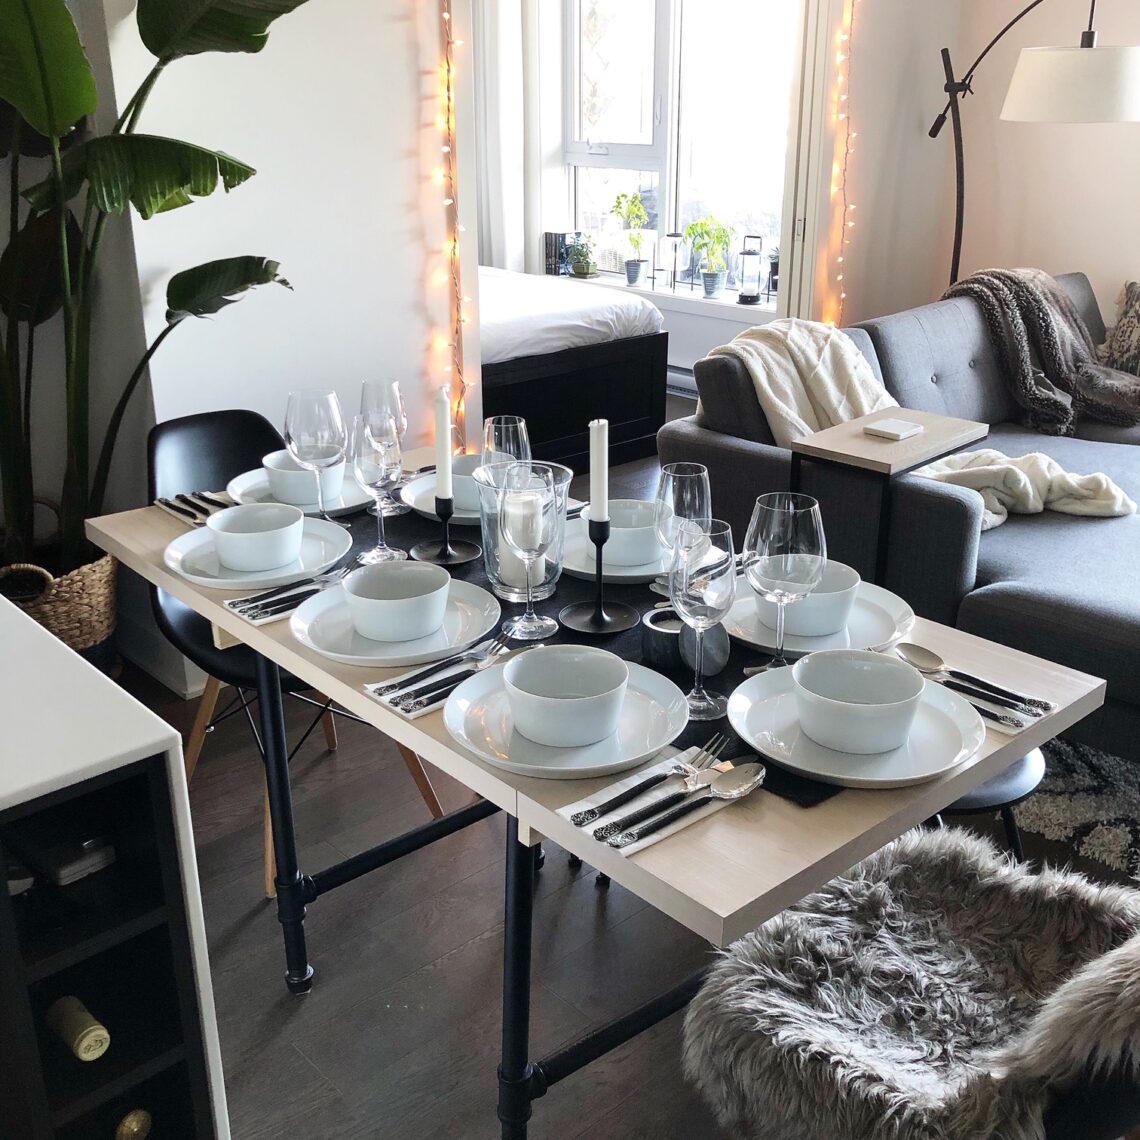
DIY Drop Leaf Table with Pipe Legs
If you’re not familiar with the term drop leaf table, allow me to explain.
It’s generally a small table with folding flaps on either side. Kitchen tables that aren’t extendable are kind of inconvenient in a small space, so a drop leaf table is the perfect solution.
Sure, you can head over to IKEA and buy a ready-made one, or you can get creative and take on a DIY drop leaf table project.
That way, when you have guests over and they rave about how great your dining table is, you can nonchalantly mention that you built it with your own two hands.
Tools & materials
- 3 maple wood boards (55×9″ each – thickness to your preference)
- 2 slabs of pine wood (2x4x23″)
- 2 slabs of pine wood (1x4x23″)
- Pipes
- 1” flanges (x4)
- 1” T connectors (x4)
- 1″ end caps (x4)
- 1″ thick pipes (x10)
Note 1: the length of the pipes will depend on how high and how long you want your table to be. You’ll need 4 small-size pipes for the bottom and 6 long pipes that will be used with the T connectors and that will be used for the upper half of the legs (you’ll see the setup in the image under Step 5).
Note 2: When the flaps are down, our table’s surface measures 33×27″. When the flaps are up, it measures 55×27″.
- Water-based black matte spray paint
- Wood glue
- SamaN whitewash stain
- Clear polyurethane
- Sandpaper
- Wood screws
- 8″ drop leaf table hardware
- Wood staining kit
- Paint brush
- Power sander
- Power drill
- Big clamps (3)
DIY drop leaf table steps
Step 1: Buy hardwood
If you’re building a dining table, you want to use hardwood because it will last you a long time. If you get softwood like pine, you run the risk of it getting all scratched up over time.
We decided to invest in maple wood, which is excellent for dining tables.
You can find good quality hardwood boards from any proper lumber store. You can normally get the boards cut and planed at the store.
Step 2: Bind wooden boards together
Binding the wooden boards is very easy.
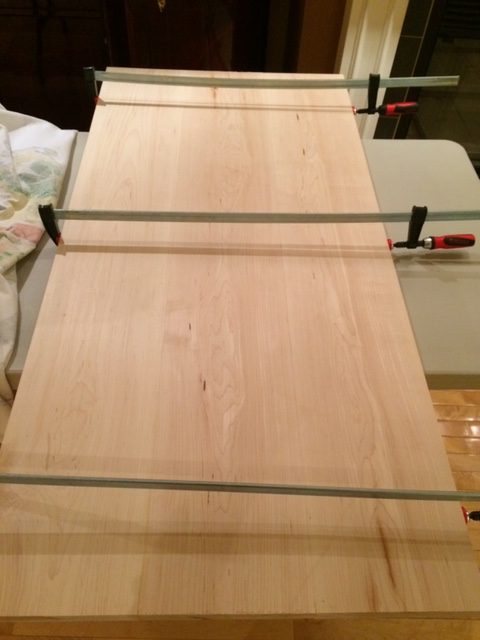
Just line them up side by side (make sure they line up properly – you can play around with the boards until you get the right configuration), add wood glue on the sides, stick the boards together, and clamp them tightly.
Let the glue dry overnight.
Step 3: Cut the edges
If you’re confident with your sawing skills, you can cut the wood yourself. If not, bring it to the store to get it cut. We brought ours to Home Depot, and they were kind enough to cut it for us even though we didn’t buy the wood from there.
You need to make sure you make two equal-length cuts on either side of the table top. Do NOT make two equal cuts on just one side of the table because the grain won’t match later on when you hang it on the other side.
We messed this up and now we’ve got to live with it.
Step 4: Install drop leaf hardware
This part is tricky.
We had to remove and reinstall these a few times before we got it right. But if you follow the instructions properly, you should be fine.
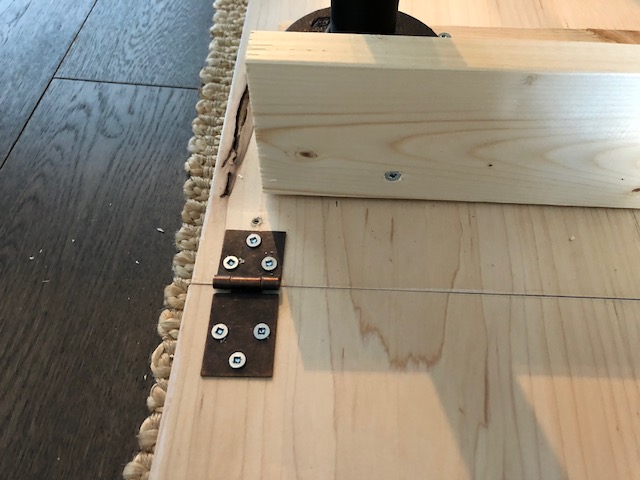
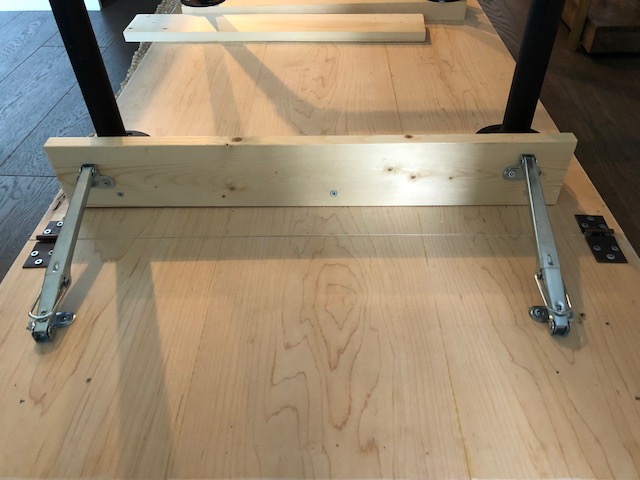
We bought our DIY drop leaf table hardware online, and we’re really happy with how they turned out. You’ll have to install both the drop leaf supports and the hinges.
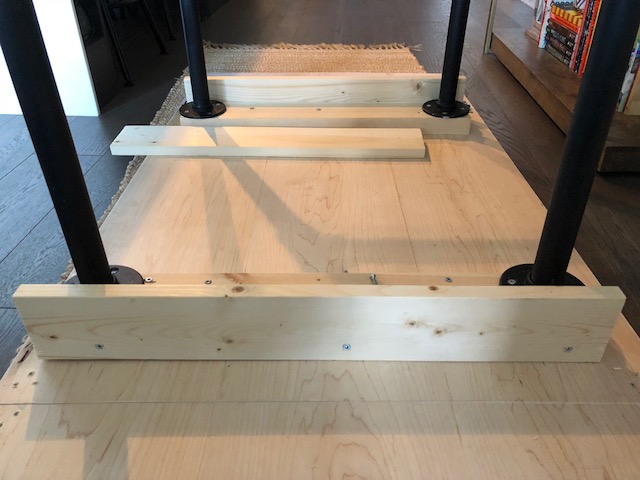
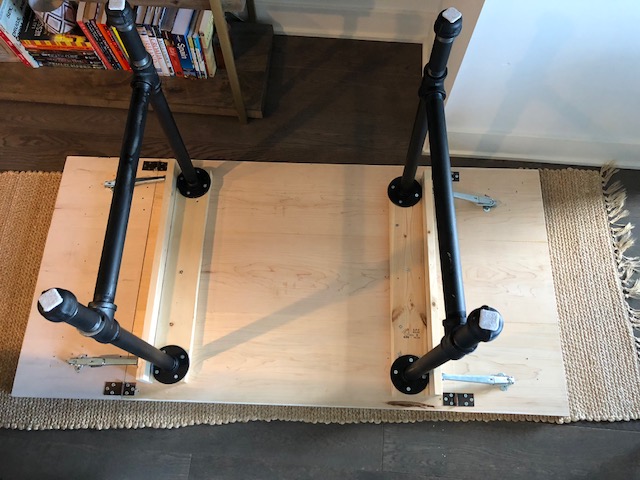
Since you’re building a standalone drop leaf table (as in not screwed into a wall), you need to screw in pieces of pine wood on the bottom of the table to be able to install the hardware properly.
The images below will show you how to install the extra pieces of wood under the tabletop (perpendicular to each other) and how to install the hardware.
Step 5: Install pipe legs
If you want to know how to prep and spray paint pipe legs before installing them, check out steps 2 and 3 in my post on how to build a wooden bench with pipe legs.
Once the pipe legs are ready, assemble them as shown below and drill the top flanges into the wood.
You can adjust the height as needed by screwing the pipes more tightly or more loosely. You should also stick felt pads underneath all the legs so you don’t destroy your floor.
Final results
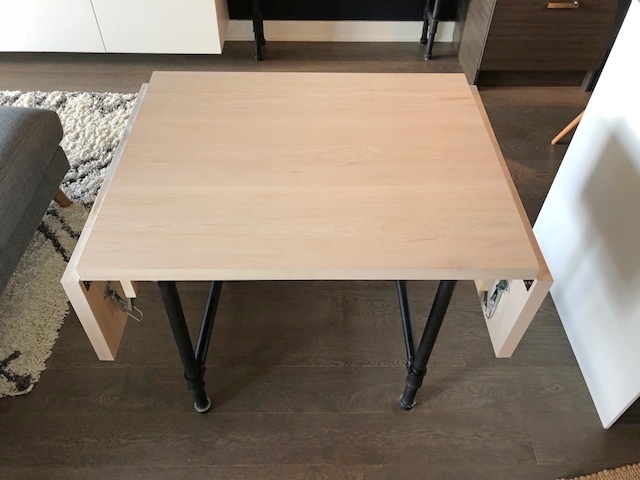
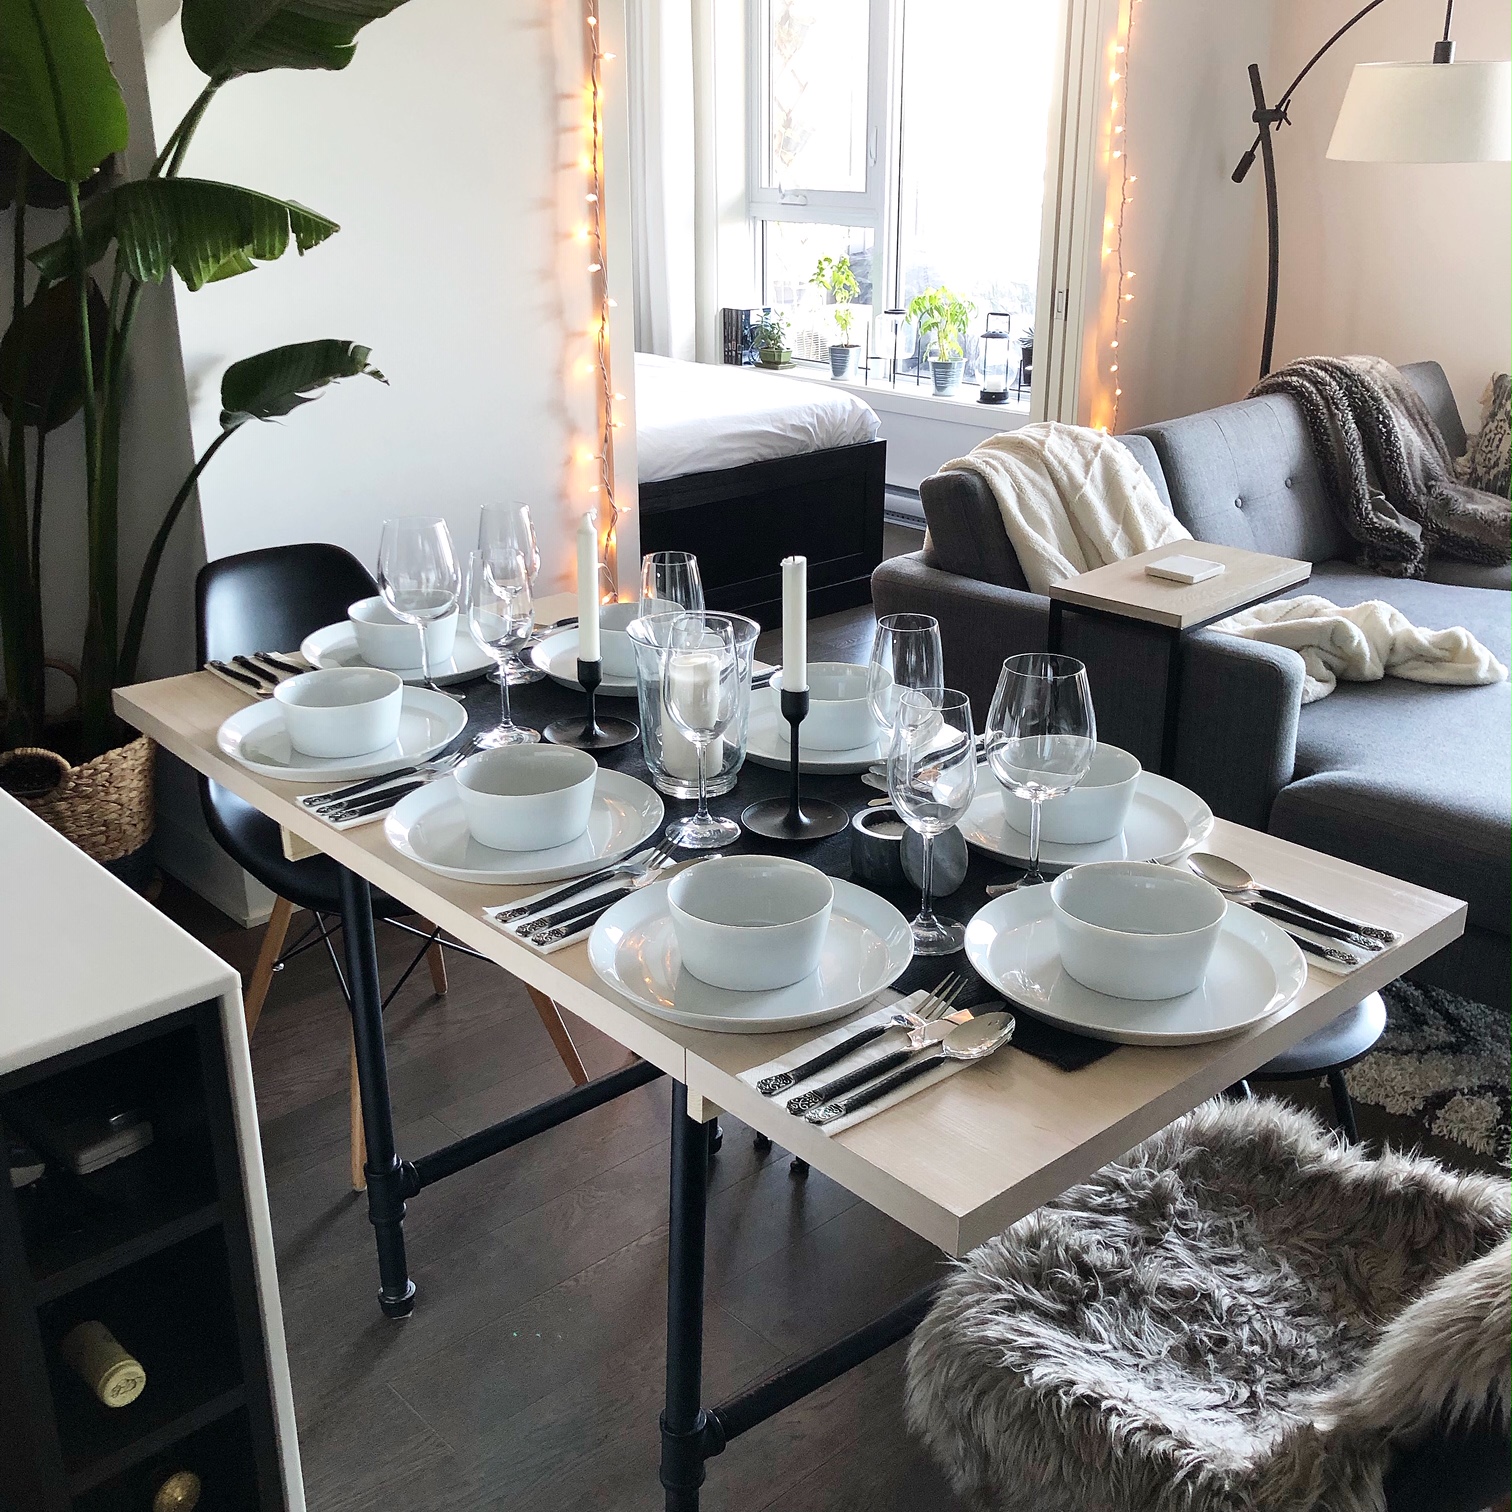
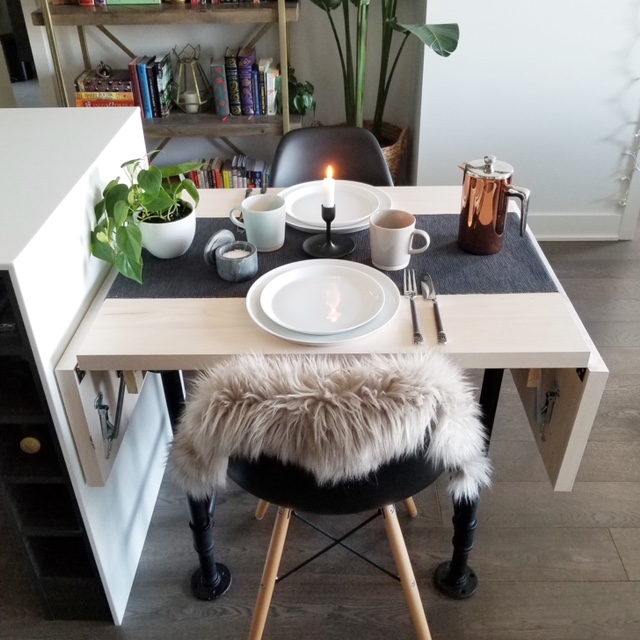
Here’s what our completed DIY drop leaf table looks like.
We are so happy with the results and we can’t recommend it enough. It’s folded down most of the time when it’s just us two, and we extend the flaps when we have guests over. It’s the perfect solution for a small dining room/kitchen.


5 Comments
Meredith
Hi! Love this! I have a question. What length is your drop leaf table hardware? I see 6”, 8”, and 10” available in most places. Thank you!
smallspacedesigner
Hi Meredith, so glad to hear you’re interested in building your own drop leaf table! The hardware we bought is 8″. I tracked down the exact website we bought it from. Here it is.. http://store.workshopsupply.com/catalogue/table-hardware-drop-leaf-support-p-377.html Hope this helps and good luck!
Margie
Would like to make this but make it make it 50” long and 10 inches wide with 10” drop down on each side. Would that work with this design and not tip over.
smallspacedesigner
Hi Margie, I think it should work but you’ll have to try it out and see. I can’t guarantee anything. The pipe legs are extremely sturdy though and my table has never tipped over.
Margie Masterson
I love this table! Would like to know if you think I could make it a
10 inch wide and 50 inch long table with 10 inch drop down
on each side. Would the weight of the metal legs keep it
from falling over when side are down? Thank you.